Showing posts with label pictures. Show all posts

Saturday, July 6, 2013

The Old, The New and Other Cool Stuff

It's embarrassing to admit last year's December Daily album remains unfinished.  Journaling is not my strong suit and this is the only element remaining to complete.  I've firmly committed to completing one page each day until finished.  Four remain.  Baby steps.

Another project completed (tonight, yee-haw) is indexing all the stamps.  Most would still consider me a rookie, but stamping over 200 stamps by category is not child's play.  Now when out shopping, I'll think twice about buying 15 sets at a time.  I will not get behind again.  Once they come into the house they won't be put away until they've been stamped into their corresponding page.

I bought the 4x6 Fiskars Easy Stamp Press before beginning the task. 
 I can no longer imagine stamping without this tool.  From the beginning stamping has always been hit-or-miss, mostly miss, and as such created dread when a project included stamping  This allowed me to become a pro overnight.  Stamps have no choice but to comply with equally applied pressure.  For the first time I can stamp a clean, crisp image every time.  This rates as high as review scales go.  A definite must for both beginning scrappers and pros alike.

This vacation's mini remains in the conception phase.  I've selected all the photos, which go out to print tomorrow and I've committed to the size (8x8) and using the Fair Skies collection.  Now to get motivated.


Wednesday, September 26, 2012

Productivity

Little Darlings Page Element
 I've decided the best approach to each page design is to treat each element going onto a page as a mini-mini page layout.  For example: one page cut out is backed with a coordinating paper, both the bottom paper and the cut out inked, lace applied to the back of the cutout image, and apply an even smaller element inked and Stickled.  A simple 2.5x3.5 image comes out as a 5.5x4.25 micro page consisting of six layers.  This doesn't count the four to seven layers the embellishment will be mounted upon. However, it turned out  looking rather professional, or at least pretty good.
__________________________

There was a special father-daughter soccer game this evening.  We brought along the camera to capture a few unique elements since this year's soccer album needed a few more photos  Everything went well until the very last moments of game play.  The star of the show was running full out chasing the ball before it went out of play.  Very close to this area was a mom also taking pictures of the game.  Predictably, it turned into a disaster.  Before anyone could take corrective action, Miss J ran into the lady on the ground.  Almost.  The lady had a small dog, leased, sitting directly in front of her, and it being fully conscious of the mayhem about to take place jumped up and attacked.  The Miss ended up with multiple and deep bite marks on her thigh and lower leg.  These quickly turned into a very ugly blue mixed with red blood.  I've never seen her cry over an injury before, but this incident caused large wet tears to well. 

Fortunately for all, the dog is fully vaccinated and current with all other required shots as well registered with the, but will still be sequestered in the pound for ten days due to asinine city policy .  What is wrong with that picture?  I was spitting mad that despite following all the rules the family has to be separated from the family pet, and to add insult to injury (so to speak), must pay impounding fees.  The lady was generous enough to allow a picture of the dog and its victim.  That will be a great page to scrap... when animals attack.

Tomorrow we run down to the doctor's office for a tetanus shot.  At any rate, the team won the game at 2-0.

Wednesday, September 12, 2012

YouTube Fame!

It's about time!  I posted my first ever video on YouTube.  I'm famous now.  Just like every other person on Earth. Not to give away too terribly much, wanting to keep my audience in nail biting suspense, but the video involved ants.  Yes, ants.  How's that for a YouTube howdy doo?

Before the creating begins in the morning, I thought it appropriate to demonstrate why creating this album at this time is entirely appropriate.

The Original Baby Book, c. 1962

Back Cover

Front Cover

Binding


This is a disaster.  Easier to replace than restore.


Thursday, August 9, 2012

Scrap-lifted

This layout is one I virtually lifted from the page of another artist, NMscrapper.  The paper was on hand (or maybe I ordered the paper after seeing the original layout) and a store accidentally sent me the chipboard pieces - really! - and I immediately knew which photo belonged on my version.

Adaptation of original layout featuring my mother, 1953


Scraplifted from NMscrappy, posted on Scrapbook.com


I'll readily admit the original looks far better than mine.  (Better photography, to begin with!)  But the similarities are striking.

I was particularly proud of the pleated flowers I made from scratch... my first.  I recently bought a Cricut cartridge, Flower Shoppe, that handily allows me to create the yellow roses found on NMScrappy's page.  I'm still working with the cartridge, but this demonstrates the progression of skill acquisition over time.  Today, I would have copied the yellow roses and applied them to the LO.

I created this layout when cutting very pretty paper still seemed rather sinful.  I learned after this paper could and should be cut, which cracked the barrier that kept me from opening the virgin G45 stacks.  Although I loved the paper line, Printery, I didn't realize it came from Prima Marketing.  Had I, I probably never would have used it.  It's just good that it did.... plus, I still have more of the paper to hoarde.

Tuesday, July 31, 2012

Lots to Cover & So Many Photos

We're back from vacation and there's much to cover in this post.


Crafty Secrets & Cricut Haul
EDIT:  Picture Revised.  The original photo posted reference a haul from last week.  This photo was the one intended for this area.  Apologies from the author.

 Several items ordered before we left arrived in the mail today.  I referenced a vintage stamp, paper, postcard company a post or two back, the order shown to the left.  The order was a sampling of some of the many products available and not surprisingly, was happier with some items more than others.  The various stamp sets are perfectly suited for several projects I'm due to begin in the coming weeks.  The little boy alpha stickers will quickly disappear.  The postage card/journaling tags will slowly find secret spots as other projects evolve.  I'm not sure how much the baby book chipboard stickers and chipboard pieces will actually end up in the Graphic 45 Little Darlings mini-album I begin work on this month, but with product in hand I'm now certain the colours match perfectly.  This was more luck than anything else. The Flower Shoppe cartridge from Cricut also arrived and this one will save over $100 within a day of work.  These cartridge offers endless dimensional flower combinations that, for under $20, cost about the same as one standard punch of this type.  My deepest regrets, EK Success. 


Butterfly, Turtle & Potbelly Pig charms
Dinosaur charms

Along side the need for a quick buildup of paper and fabric scrapbooking flowers, I've also found my charms collection miserably lacking. 

Charms are used extensively to decorate the outside binding of mini-albums; a charm bracelet for a book, as it were.  During each major phase of the vacation I bought several charming (ahem) charms representing that event; and, other pieces I thought might come into use down the road.  The dinosaur charms are precious!  I plan to use these within the Texas vacation mini as tag danglies.  I'll post pictures of how they're used once put into pace.  The cute little pot bellied pig will be seen again in the upcoming mini album project using the Graphic 45 Olde Curiosity Shoppe paper collection.  Unfortunately, the gift shop at the Japanese Gardens didn't have a koi charm of any sort, which was a major disappointment... the quest will continue.


July 27th, 2012


 I couldn't resist posting one of my favourite photos of Martin feeding the koi during our visit to the gardens. The fish practically climb out of the water for their kibbles.  The little guy's mouth is wide open waiting for him to drop in the pellet.  Is this a great shot or what?  I love it!


Next are the photos of the book's layout almost naked, before attaching the vacation photos and other memorabilia inside.  I've flipped at a breakneck speed through most of the pictures we took and can already tell I'm going to add a few more pages to the album.  I suspected this would be the case, and planned accordingly, but waited until knowing exactly what we had before committing to the work.  (See post: TP & Thinking, June 26th, 2012) Those, of course, aren't represented in this showing because they are still locked in my head and scattered throughout various parts of the scrapbooking room.
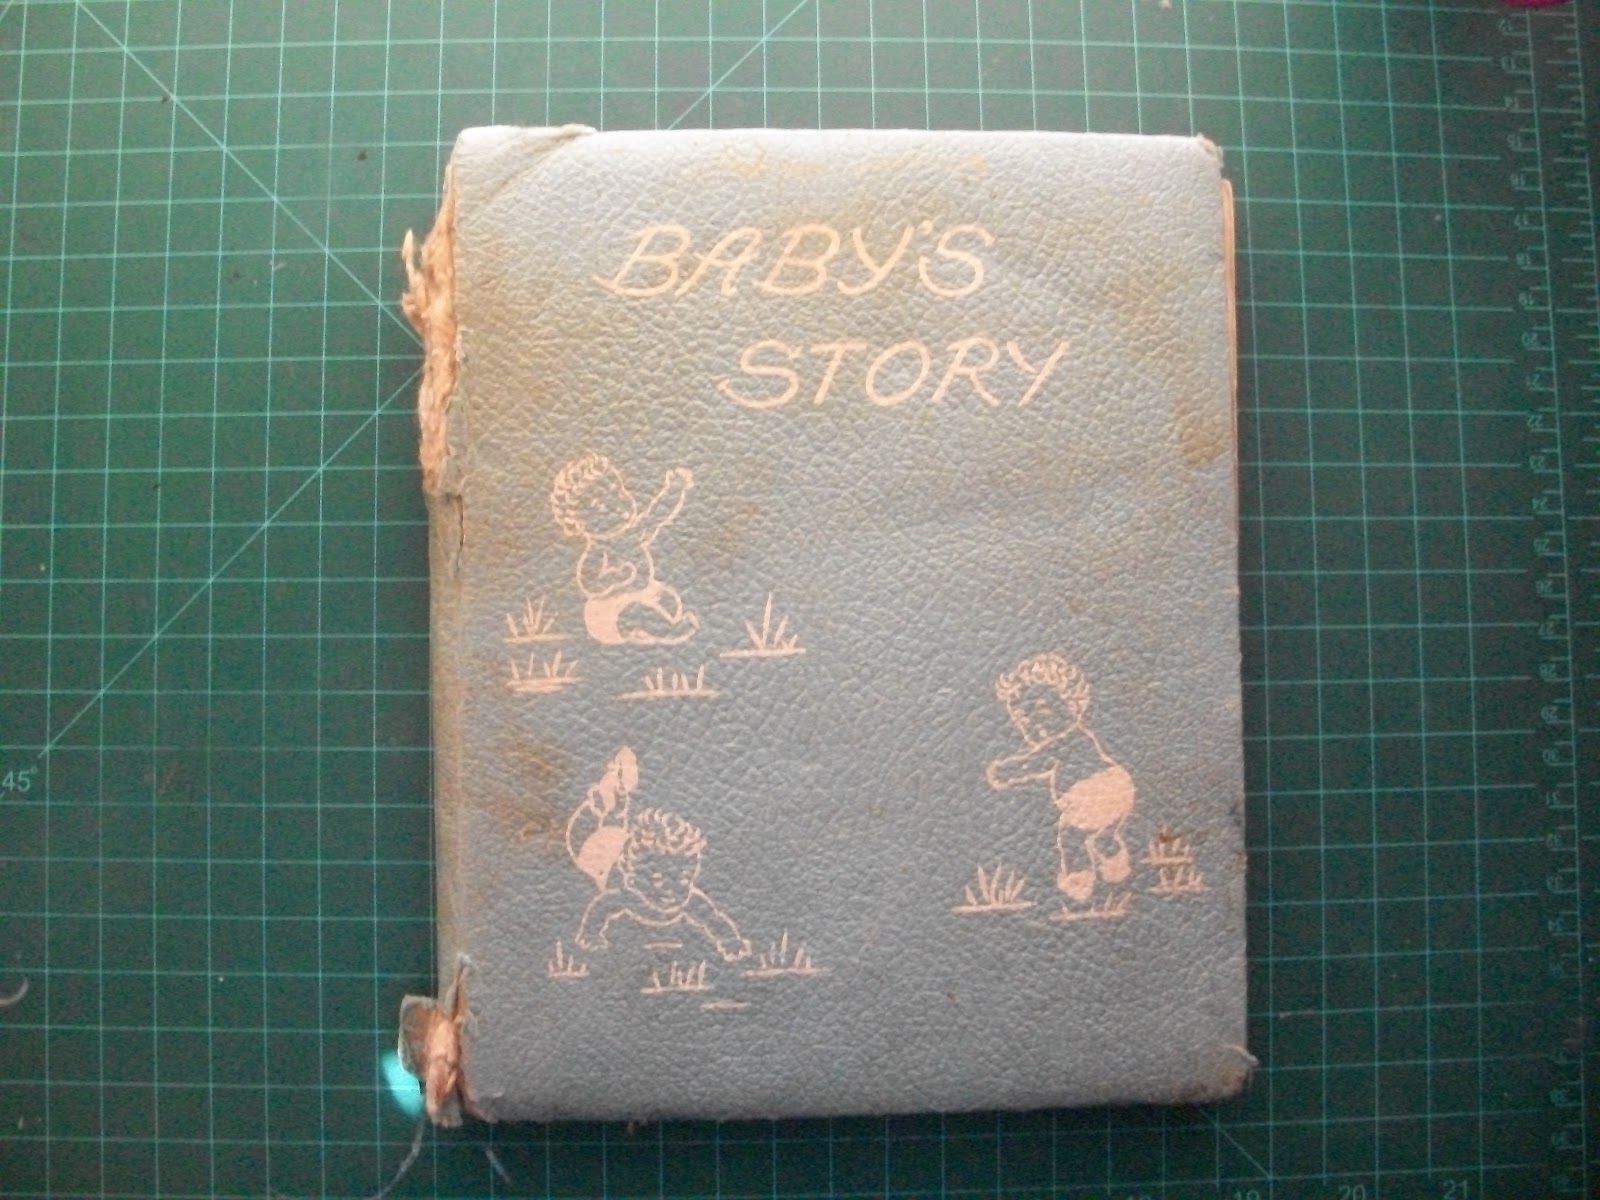
Front Cover

Inside Front Cover


Japanese Garden Pages


Museum Pages - Info Bundled, Ready to mount
Self-descriptive


Family Photos & Small Pocket Page

Flip Page Details
Glen Rose - With Back Inside Cover


 ( How nice it would be to quickly figure out how to neatly arrange the photos, but this is a first and it's late! :D  
Oh, well)


I'm particularly proud of this mini-album because, although I've learned many of the techniques from other great scrappers, the layout, paper combinations, and design are 100% mine... no scrap-lifting involved.


School starts back this week so I'll have many hours each day to devote undivided attention to several upcoming mini-album projects.  The baby book, the boy's younger years, and two identical copied-to-the-letter Old Curiosity Shoppe albums - one for here and one as a Christmas gift.  The album I plan to shamelessly copy - not once but twice - is shown on YouTube here.  Almost needless to say, but said, is that all the paper lines will come from various Graphic 45 collections.  Does the company sell stock?  If so, buying in could prove a solid investment.

I promised to cover a whole bunch.  Delivered, with a smile.  Blessings!

PS... The vacation was positively awesome.  We had a blast.

Tuesday, June 19, 2012

Playing with Denim

My helper and I tore up a pair of smaller sized bluejeans, among many other materials, to make all sorts of clothing for Bear, a muchly loved "baby."  At the end, there was still a small basket filled with bluejeans scraps.  Since I'm in the midst of creating a little boy's mini, denim might come in right handy for the project.  Before today I'd cut strips of the material as "ribbons" for Martin's ABC Primer mini;  but that was the limit of my experimentation with denim and scrapping.


Pulling out a couple of items/tools close by I first attached a scrap onto a piece of chipboard, and brayed it tightly down to dry. Once relatively dried, I ran the chipboard/material through the Cuttlebug with very impressive results.  Finally, I used the Big Bite to punch a small hole in one corner and then set an eyelet.  Wa-la!  Instant tag.  This has huge potential!  If denim worked this nicely, there's no end to adaptation possibilities.

Denim applied to rough-cut chipboard


The question remains as to what process will best keep the material from fraying.

I haven't taken photos of a denim related experiment yet.  One would think by looking at others work, flowers are as key to scrapbooking as paper.  Flowers have their place, but not so much on more masculine pages.  I've cut circles out of the material at 1/2 to 1/4 inch decreasing increments and stacked the pile to make lollipop flowers. The stacks can be as simple as 2 layers glued upon one another or as many as the creator wants to apply. Apply a proportional button or other embellishment to the center, and wow-za! Not-so-feminine flower embellishments.  The next chance to sit down and play again, my great helper and I will cut circles out of a contrasting fabric and build the floral embellishment with layers of a daintier material sandwiched between the denim. 

Pictures forthcoming.  Also included with be Bear's new fashion wardrobe!

Wednesday, June 6, 2012

Persistence

Persistence pays, but oh boy at what a cost!! 

I've decided mini-albums fit our lifestyle better than the 12x12 inch layouts.  Everything has a place and purpose, so I'll never totally abandon the larger version; perhaps the "best of the very best" annual album, or something along those lines.  From now on, most of my creative energy will go into the mini's.

With that thought in mind, I've come to the solid conviction made-from-scratch mini's are probably best left to professionals. I hate, (scorn, despise, revolt, etc) putting out inferior products.  There are allowances for skills not yet mastered, but not by much.  There has to be an exponential learning curve to scrapbooking skills, but more rational people would try to master one before going on to the next.  Not I, heavens no!  I want to master it all in one horse pill sized, gagging swallow.  


If there's a mistake to be made, almost corrected, and the same mistake made again, I'll do it every time; hands down.  Subsequently, a weekend project for most will take the weekend and the following week - and that's if I'm lucky.  It can be so very discouraging.  Fortunately, persistence runs in my DNA or this hobby would have been abandoned months ago.


At present I'm learning everything possible about book binding.  There are as many techniques as skilled crafters out there, but a couple of methods keep popping up as the most reasonable and flexible.  Maybe, if I can calm my butt down, I'll get reasonable skilled at this.  But not today.  Oh, no, not when this skill was critical to the project.  In common fashion, I'll have to put the project aside for a few days and practice this new skill until proficient.  That's why the weekend project takes ten or more days to complete.  Every project taken on has a whole new area of discovery, and learning.


On a more positive note, I've mastered a few skills; which makes a significant advancement for timely project completion.  (Down from three weeks to ten days.)


I've discussed adhesives before.  It comes as a surprise to learn there's more to learn.  When using the highest quality adhesives, there are tricks to make a tighter bond.  Burnishing goes a very long with with tape adhesives, and the brayer does a great job with wet glues.  The demands on adhesives are taken to new heights with all the moving and swing parts of the mini.  This was yet another hard learned lesson.


It's no secret I'm totally smitten with Graphic 45 papers.  I kept running into BoBunny projects and couldn't resist picking up a pack at one of my last hauls.  The colours are very soothing and even the brighter packs have a subtle tinting.  I simply can't wait to tear into this first package!  Someone special on my list will receive a very, very nice Christmas present this year.


It's possible I forget to post the adapted shoe organizer photo.

Most stamps & some punches


Just for kicks I decided to begin hanging some of my favourite embellishments on the 6x2 cork board running along the desks back panel.  I've only just started, but it's way too cute not to share.


Embellishments!


Wednesday, May 16, 2012

New Room, Returned Time

It took from Thursday evening (the breakdown and emptying of the craft room) until the following Tuesday afternoon to recreate the room.  I'd forgotten how hard real work can be :)  But it's done for better or worse, and I probably like the results.  Thing is, since I haven't had the chance to work on a project, there's no way of know how truly efficient the changes.  Tomorrow it's back to play time... and planning which area of the house to hit next, without the urgency of this past weekend.  At this point I can't even imagine organizing anything beyond my thoughts.  As much as I earnestly enjoy the process, I've been processed out for a day or two.

I posted the first set of pictures at my other blog.  Maybe I'll split the series between the two sites.

_______________________________________________

I managed to make a run to TM while in Fayetteville earlier this week.  The question posited in a earlier post about a binder system is answered.  I had wondered whether the Zutter or Cinch systems to go with.  The decision was made for me!  On the shelf sat a Zutter (Bind it All) for less than $40. No more comparisons beyond that.  Like everything else acquired over the past week, it sits waiting to be opened.  There's not a real need to play with it yet, three other projects based on rings precede the necessity, so it may sit for some time before pulling it out.  That just seems so wrong, but for the price, well...  Did I mention we picked up the UTEE?  Again, this whole timing thing.


_______________________________________________


Ah, heck, why not do some more before and after pics now?


Prepped for furniture (the photographer took a slanted photo... the wall is fine!)


A very narrow bookcase.  Decidedly bare.


99% complete.  Still not sure what to put in the middle area; thinking something decorative.  Amazing that it holds all the card stock purchased thus far!

Thursday, May 3, 2012

Discovered UTEE

Something about funds, or lack thereof, altered my plans to attend the SSD warehouse sale.  It wasn't meant to be.  I did, however, stop by the tiny TM in Rogers and found the Crop-a-Dile Main Squeeze for pennies on the dollar.  Upon further inspection, I'm not sure the investment was a good one.  The concept is great, and if embellishments outside what the company offers work, the story changes.  Otherwise, this will be a very expensive press... for garlic maybe???  What's really needed is the Crop-a-Dile II.

I've owned Glossy Accents for a number of months now, but let it set because it seemed too expensive to use, and embossing powders gave a bit of shine where needed.  In the making of the mini-album, I hauled the bottle out... and WOW!  How did I do this without the glossy bling?  What I didn't realize after this discovery, until seeing it on YouTube, was that the surface had only been scratched, so to speak.  The next step up is the Ultra Thick Embossing Enamel (UTEE). Playing with it when it comes into the house will probably set the album back a few days, but this is a tool to master.  I'm wondering if this could change the way I look at charms; they are much too expensive for general use right now, and want to change this.

_______________________________

Speaking of the mini-album (what else these days?) I decided to make the ABC Primer documenting my husband's childhood days photographs before starting the one intended for me.  I found a video with step-by-step instructions on YouTube (where else?) that's perfect for my current skill level.
 
 
   This is a great introduction since the lines run very straight, without all the flourishes and complicated cuts planned for the other book.  I'm learning exponentially at present, and it's all to the good!  I'm lifting the book straight from her design, but can't help but think that anyone who makes 18 videos outlining every step and cut minds being copied.  (Trying to sell the album as my own design would be less than ethical, but that's not a problem.)

________________________________

I absolutely adore the two stencil sets bought from Kiwi Lane Designs.  Since discovering the site, they've had only one sale, just before Christmas, nothing since.  This Saturday they're having another.  There would be nothing more pleasing than having everything they make, but that's unreasonable.  I will settle by buying only one more set to add to the collection this go round... darn.

__________________________________

I'm having a blast decorating containers and house decorations.  One of the latest creations, for the coloured pencils collected over the past 20 years or so:


Quickie Photo


Friday, April 27, 2012

G45 & Breakthrough

I've studied Graphic 45 papers, psychology, and its philosophy intensely for almost a week now.  I think I understand the company.  There's a reason beyond incredible graphic designs that make this paper unique; someone either at the company or hired by such studied scrapbookers practically under a microscope.

Nothing about this brand intimidates. I've began cutting away and there's a beauty in doing so.  I'm so impressed with the company I already purchased the full line of the ABC Primer collection for Martin's hallmark childhood album.  Around the end of May I'll order the Magic of Oz collection to highlight my lovely granddaughter's "Scare Crow" professional shoot.  Maybe someday I'll actually pick out a few pieces of "regular" paper to scrap a page or two... but for now I'm having a blast learning to work with G45, including cutting out less than 1/2 inch butterflies for adornment.

So far my mini-album progress has advanced only to selecting coordinating buttons, ribbons, paint, chipboard, and pulling quotes out of my original baby book, now falling apart at the seams.  Much of the next week will consist of cutting out elements.  Hopefully, it will eventually begin to look like "something" instead of the mess currently on hand

Early Organization


Something clicked watching so many G45 scrapbooking videos.  Planning a page up until very recently was a very involved and mind exhausting process.  The other day I needed to quickly scrap a Futsbol series.  (Before the pictures were accidentally misplaced)  It took precisely 35 minutes from need to conception to completion to pull the page together.  Better yet, it's one of the best LO I've done.  Suddenly, the layering, framing, colour use, and element choice has become almost automatic.  I can spot "wrong" in nothing flat.  Not that I'll never commit the same crimes again, but I know it when it's there.  Oh, but should all design go so smoothly in the future.

The cute shot reminder LO hangs on the icebox and has done wonders to prompt medication action in good time.  More than that, it's caused me to look around the room to find the "blah" areas and throw something together to spice it up.  In less than 10 minutes this evening, I brought back to the craft room the small, plain Crystal Light plastic container we've used for a couple of year to collect Box Tops for Education and Campbell's soup labels until delivery to school.  It blended into the counter space, but the visible contents always made the container appear a tiny bit disorganized.  To the results:

A little "pretty" for the kitchen counter


Breakthroughs are one of the best parts of the art!  It's what drives us.

Wednesday, April 18, 2012

Stuff

My husband began a new diabetic medication, though while not insulin, does require two injections each day.  He handles the morning dose just fine, but not so much with the pre-dinner shot.

I've decided to venture beyond scrapbooking proper and make a cute little 9x9 framed page to hopefully prompt his memory before dinner.  Going all out, I'm working with colours and sizes never used before.  It should do the trick; if not as a visual reminder, then as new splash of colour in a very monochromatic kitchen.

When I first began using the Cricut I counted a well-cut image miraculous. I stayed very, very basic with the cuts, and came to the point of frustration where I almost decided to sell the kit and kaboodle. Time and practice has refined enough to get the image I want every time.  There's enough confidence to now have fun and play around.  And... I no longer fear cutting the pattern on 15 different pages to get the results desired.  The differences between the first successful cuts and what's put out today is remarkable!  While still plenty of room to improve, it ain't half bad.


A Cricut Rooster


Thus far, I've given the mini-albums a mile-wide divide between them and me.  No way, never going to happen!  (That pesky word: never)  Finally, at long last, I saw one of these, putting to great use the beautiful Graphic 45 paper.  To put it simply, I was awestruck.  This is what scrapbooking is all about!

Graphic 45 Mini Album  at YouTube.  I am going to shamelessly copy every little detail demonstrated in the video.  I'll practice all the different techniques on less expensive paper, so maybe there will be two in the end... maybe three or twenty before getting it right?

During a total mental meltdown last night, I created a list of all the scrapbook paper/card stock packs.  The list includes the manufacturer, size, dominate colours, coordinating accessories on hand, and special features such as maps, stamps, tickets, etc.  There were almost 50 packs accumulated thus far... this is on the frightening side of paper obsession.  This list does not include single patterned, themed papers, or special bonuses like vellum and transparencies.  There must be a totally different approach to the 7 inch stack of primarily unsorted paper.  Perhaps tomorrow I'll inventory the paper kits on hand; another 5 inch stack I've lost the ability to instantly recall.  Stamps will have to follow at some point soon; just trying to think of the most effective way to accomplish/organize the system.

It doesn't get any simpler than this, but the dowel rod was finally hung in the closet (amazing dead space remains!) with three evenly spaced curtain rod support screws.  Most ribbons fit on the rod, but a couple more spools will necessitate another row.

I ordered my first Cricut Cartridge since December.  It was on the list and at the right price.  What's up with eBay charging as much, or more, for these cartridges as can be bought in stores?  I wouldn't have nearly the collection if most of these were bought at (usually) less than $20.

At long last, I want to offer praise to our Lord Jesus for answering a prayer thought unanswerable.  Well, I knew He would!  The answer came in the form of yet another miracle, but my God always does it in style.  Thank you so very much, eternal praise for your faithfulness.

Sunday, April 15, 2012

Page Theme Issues

I'm still studying differences between good, great, and wow-za pages.  And learned a couple of things today.

When putting together a page I pull out all the possible paper combinations, dies, stickers, stamps, etc I expect to use, or possibly use.  Without exception, one element will capture my fancy and, wrong as it is, I'll walk on hot coals to incorporate it.

I'll use the project currently under construction to demonstrate this point.

The page features a trip to the ocean.  The colour scheme runs to pastels.  I also wanted to blend shabby chic with just a bit of whimsey.  (Probably my first mistake)  The element I fell head over heels in love with was a couple of starfish cut from a die, and stamped with a truly adorable face.

Blurry, but a fair representation for this purpose

Cute as buttons.  So far, no problem with page assembly.  The starfish works well with the photo matting demonstrated in the photo.  There are two photos featured that go on the page, one each for the right and left side.  I set waves consisting of four layers of papers to create a bottom border for the page. (I cut and chalked a few fishes to appear to be jumping in and out of the waves.  Darling!)  The title will go in the upper right hand corner, and I plan to use three separate journaling boxes between the space of the two photos.  So far, all works together very nicely...

But this is where this "hooked on an element" becomes a problem.  I need "something" that binds the two pictures, and creates another layer of depth for the journaling boxes; perhaps a large strip of paper, 12x4 inches.  When I laid the thick mid-line border across the page, I got "blah."  I then began playing with one of the Tim Holtz masks picked up the other day.  Love at first sight.  That was the answer!!  Except it wasn't.  The chalked image creates a very formal setting.  Not at all within the theme, nothing whimsical about it; however, I really, really want to use it.

A much smaller image than the mask I would use, but it's easy to see the formality.


So that's a huge chunk of my problem... choosing two non-complimentary elements to a page.  I usually justify using both and calling it "mixed," but it's not.  It just proves my lack of experience.  Maybe someone with much more experience could pull it off, but I can't with goodly results.

Since I'm more than three-quarters finished with the page, it will have to be the flourish to go.  This will be a first.  It's a start in the right direction, however.

For now on I plan the page theme and keep cute away from formal.  It can't hurt!

Thursday, April 5, 2012

Latest LO

The LO mentioned last post is now 99.9% complete.  There's a journaling note required completely forgotten about.  I think it looks tacky, but may be able to correct it with some glitter in the morning.  (This tag will be removed before framing the page.)  The only other item left to attend involves good sunlight, camera and tripod.  I'll edit this post to include the photo after a satisfactory picture is cropped and sharpened.

This LO has much more white space than I'm accustomed to allowing, but in doing so I've allowed the eye to draw to the ares that were most important, or important as I saw it.

The photo of Martin and I used on the page is one of my all-time favourites!!  There's a little bit of silliness, and a whole lot of adoration caught at the most perfect moment.  I knew this would be the first photograph of the both of us to scrap when the right combination of time, inspiration and motivation hit.  And it did. 

It probably gets old, but I'm proud of the display.  I take pride in all the LO's done, but some don't have the same ooomph that rare others do.  This is one that gets framed and posted in our bedroom, along with the birthday "card" page completed last November.  Finally!  Some "art" for the room.  (Term used loosely.)

Even though decorating the coloured pencil bucket was a little over the top, I am proud of it.  Tonight while perusing YouTube, I found several videos featuring decked-out ATG guns.  Some looked professional, some looked as if they graduated 1st grade colouring class and never advanced from there.  It's theirs, and as long as they take pride in it, that's all that matters.  So now I'm thinking... given some down time, it might just be worth the effort to follow suit.  No doubt whatever I do will end up looking like the 1st grade child that failed that colouring class.  LOL.

Next week I hope to knock out three or four "everyday" scrapbook pages.  There's currently two semi-assembled pages featuring Johnna and her quirky ideas of scrap worthy events.  One involves all the not-so-major scraps, bruises, and rashes she proudly displayed for the camera, and the other concerns her foot and hand prints at age ten.  (Actually I thought of it, and she jumped at the notion.)  Also thought upon, but as yet began, are the 2012 snow photos and a few more pages from this past Christmas.

Tuesday, April 3, 2012

Colour Combo

I enjoy the challenges presented by CSI.  The entire point of the site is to encourage the scrapper to use five colour combinations normally not easily put to work together.  As so it is this week, also.  Another feature of the weekly challenges is incorporating shapes, elements or themes, often together.  And not least of all, journaling is part of the creation; this isn't a problem for me as I try to always journal about the subject or event represented.

This week they assembled a colour chart of a mustard, two tones of taupe, one green, and a sky blue.  I had no problem pulling all the colours from on-hand papers and putting them together in an attractive manner, but when I tried to use the blue as a background colour it clashed to high heavens.  The colours behind the heart photo are the actual colour combinations for this week.

Since there's no requisite size of the colours, they can be nothing more than accent pieces, or completely dominate the page... so long as it's there, it's all good.

I got very, very sneaky.  I glued sky blue gemstones to the cut out hearts I made for the project.  And though the gemstones in the second picture are not set yet, I managed to pull the blue up to the upper portion of the page.  (What a beautiful picture of Martin and me!)


There are times when I have to think outside the box.  It's very easy to slip into one style of layout, using the same materials and colours.  I don't think this would have ever come to mind had I not been challenged to fit together elements not normally used, but sure am glad that I did.

Thursday, March 29, 2012

Not Really a Second Post for the Day

This isn't really the second post of the day.  In my excitement over the hall yesterday, and not desiring to forget anything, I posted the blog previous to this in my Myspace blog.  Today I transferred the post to here; a more appropriate setting.

I've spent nearly twelve hours re-organizing paper and paper scraps.  To accommodate for a hefty but handy pre-sized paper cuts, some of the smaller dies had to be consolidated.  So too with other tools, but it will be worth the effort in the end.  Not administering enough organization torture, I labeled every bin and drawer.  Needless to say, after only twelve hours into the project, the room looks as if a paper bomb went off.  I really need to track how often I go through these two-to-three day organizational fits; it seems I do this at least every other month.  But wait!  There's more accomplished today...

For my coloured pencil collection, I saved an old coffee tin.  Yes, it's totally filled, but this collection goes back at least twenty years.  Back when the boys were kids, and I was a Camp Fire leader, I put all the crayons in a coffee bin and decorated it with a wallpaper scrap and crayon wrappers; the exterior decoration lasted virtually forever.  Each "play" coffee can had a unique decoration so they could pull the can and know what was inside at a glance.  The coloured pencil can has served well, but it was nothing to brag about.  It really bothers me when a container I use is ugly.  With some help for my great helper, we decorated the coloured pencil bucket with very pleasing results.  I added a pencil sticker on the label after taking the picture, which adds that much more cuteness.


Sometime early last year I found a small plastic accordion folder in Hobby Lobby's clearance section.  It originally sold for $10, but because it had a busted carrying strap, I picked it up for $2.00, I think.   We buy cat litter in boxes that have sturdy plastic handles.... just about the size needed to repair the accordion folder.  A match made in heaven!  Better than that, the new handle is of better plastic quality than the original.  All due credit goes to Martin that thought to marry the two.  He's one smart cookie!


I picked up a black painted wood frame with a mysterious slot in one side for 50 cents while at SSD.  Playing around with it, we discovered the slot perfectly accommodates a scrapbook page.  Martin wants me to go back and pick up as many as ten, should they still be there.  His idea is that we (yes, he likes to help scrap sometimes, too!) design decorative holiday pages to display for the various seasons.  He also wants me to display a few scrapbook pages around the house instead of photographing them and throwing into an album.  It will take an hour to make the round trip, so I hope it's worthwhile.  Maybe call to find out before leaving the house?  Nope, there might be new stuff on the floor tomorrow.  As much as he thrills over this prospect, he has yet to see what scrapbookers are doing to deep-framed art canvases.  I can put together a piece of art to hang on a wall for under $10 for what departments stores sell at $20-30, and can do a better job of it.

Probably not this year, but perhaps next, I take this hobby to the next notch and try to sell cards at the farmer's market.  I've gotten very good with cards, but don't feel I'm up to the commercial level yet.  I've always been crafty, but never considered ever making a profit from it.  Who knows?


Friday, March 23, 2012

Ca-rot Top

I've been wanting to scrap this page for a long time now.  The only problem is the quality of the picture.  The back lighting from the bathroom window probably caused the extreme shading of the photo.  This is really disappointing, but was done before I began working on my photography "skills."  Don't think the same mistake would be made today, or at least would hope not.

The page is about a silly idea we came up with after cutting the top of a carrot that had greenery left in place.  The thought was that if we planted it, we would have a nice carrot at then end.  It got really bushy and healthy looking for about 2 months, but suddenly wilted.  The time was right for my helper to harvest.  After a hefty tug, all that came up was a green bunch of wilted leaves.  No carrot.  No roots.  The whole episode turned into a very fun memory... hence the desire to document the event despite the lousy photo.

Entering contests on CSI.com's site has opened me up to using colours in a way I might not have thought before.  I still lack real courage, but this is a learning process! 

About six months ago I stumbled upon an adorable pet-themed paper pack on sale.  The pages were absolutely adorable, but until this project I had no clue where to use the paper.  Now unleashed, there's many, many projects that come to mind using this paper.  This is how it goes with most all the paper pads bought along the way. As a side note... although the camera doesn't capture it, the rabbit is actually flocked.

I created the flower and carrot sign for embellishments.  The banner in the top right and the title located at the top left are commercial products.  The carrots are the crowning achievement on this page.  I used the Cricut to cut the shape, but the paper I wanted to use wasn't large enough to accommodate the full shape I had to start with, so in the end had to trace and manually cut the actual cutout onto paper originally planned for use; all done with very satisfactory results.  I then generously inked the carrots and leaves, and if I don't say so myself, did an excellent job on shading.


My Carrot Job


The most demanding aspect in presenting scrapped pages into digital images is capturing the true colours.  For that, I'm still experimenting with lighting techniques.  Too much light and the photo turns out washed; too little and all is dimmed (as in this case).  I believe setting up a shoot in diffused sunlight works best.  I may have found the solution for taking perfectly square photos for cropping.  There is an adapter to the tripod that extends an arm that in turn holds the camera directly over the center of the subject.  The centering is most critical for cropping; any deviation in angle distorts captured lines.  These devices run anywhere between $35-60, but Martin thinks he can build one for under $10.  The question at that point is when he'll have time to get to do it.  I'll give him two months after the promise, but if there are no results, it's off to the store for the extension bar.


Saturday, March 3, 2012

Taking it Up a Notch

I've made the leap!  I actually entered a scrapbook page contest at http://csicolorstoriesinspiration.ning.com/main/embeddable/list, Case #8.  Not sure when the winners will be announced, but I think sometime this next week.

To complete the project, I used many of the techniques picked up along the way including:design, story telling, die cutting, Cricut Expression cutting (the goalie glove... got it right the 1st time for the 1st time ever!), matting, inking, stitching, stamping, and adding personally created embellishments.  It's hard believing the list isn't a comprehensive list of techniques picked up along the way.

One of my proudest achievements for this projects was working under a strict time-line. 

Even should I warrant an honourable mention, that would be enough for a first contest attempt.  There's no real prize for placement in the contest save for recognition and bragging rights. 
So this is my entry for all it's worth:

Pure Star Power, documents 1st soccer tournament


Friday, February 24, 2012

Shock and Awww!

There's still an itch to get back to scrapbooking, and yet I simply can't find the inspiration to actually sit down and do the deed.  I miss this stuff!

The Kiwi Lane Design templates arrived.  That should be enough to cause immediate breaking down of doors and pulling out the drawers and get down to scrappin'; alas, not quite yet.  For reference, I purchased the bracket and scallop 12 in sets.  They are adorable.

I found an online scrapbook store called Blue Moon Scrapbooking.  They may not be the largest store out there, and they are large, but what they have are collections and items fairly unique, and on the pricier side.  (Okay, I consider anything over $10 an item is on the pricier side!)

While perusing there last night I fell head over heels in love with a new Graphic 45 collection called Little Darlings, an infancy paper theme with 1920-30's colour schemes.  I showed Martin the collection and he absolutely looked aghast.  "Angel, how would you EVER use this paper?  It's too pretty to cut and some of the pages are works of art in their own right!"  Yep, his first exposure to Graphic 45 scrapbook paper.

The following scrapbook page is one of the very first done and is one in a series of three.  And yes, I'm still working to perfect the photographing of scrapbook pages.


Wednesday, January 25, 2012

More Ways to Save

I've mildly ranted about the cost of storage; mildly, because it's part and parcel of the craft.  I'd like to share today another nifty way to save money while keeping scrapbook items organized.

Over the year I've grown quite the patch of flowers... paper and silk primarily.  Between Cricut, dies, and templates there's almost an endless assortment.  I also enjoy crafting three-dimensional paper ribbons and embellishments.   Like everything else, it didn't take long before a system had to be put in place to accommodate the collection.

I've saved six stacking plastic ice cream half-gallon buckets.  They're scatter throughout the craft closet.  Some labeled, some not.  Even still, they all look the same at a quick glance.  So I've decided to colour code the containers so that in an instant I'll know a particular bucket contains flowers, brads, etc.  Red indicates flowers.

Organizational Work in Progress    


No, not exceptionally pretty in this DIY project, either; however, I'll probably attach a large flower on each side and the top of the lid to pretty it up a little bit.  The image will also assist as a visual clue to others who like to sneak into the closet and design something wonderful for me!  (This happens often, much to my great delight!)

In time, I'll have a colour coded embellishment organizational system in place.  There might be acid content concerns for hard-core scrappers, but for my purposes, it should work fine. 
 __________________________________

When meeting Martin's mother for the first time she pulled out a decades old scrapbook.  A woman ahead of her time.  I could tell she rightly held this as a prized family possession.  The amazing part of the physical scrapbook was that despite the decades, and despite a lack of concern of the obsession we have with acid and lignum today, the book had not deteriorated.  Yes, there was some fading and yellowing, (in my opinion perfect seasoning) but the overall quality remained excellent.  It's probably a good idea to construct albums with perpetuity in mind, but as I've just described, it might not be as critical an issue as some make it to be. Maybe.

__________________________________

Yet another recently finished page!

Silly Night


Christmas Eve
December 24, 2011

Tuesday, January 24, 2012

Sharpies & Photos

Altering photographs is scarey business.

I attempt to decorate photos  only on prints that can easily be taken to the local photo shop and have them printed again.  Never, never, never on original prints dating back years.

Today I played with a print recently back from Walgreen's and decided to use one of the journaling templates bought, but rarely used.  The template is plastic if that makes any difference at all.  For the colouring medium, I decided on a Sharpie Marker.  (Sharpie has such a great range of colour you would never expect, usually found in the art department of a craft store.)

Not the greatest idea I've come up with!  The ink sets on top of the print and the moment the template moved the ink dragged with it.  Fortunately, I was able to save the print because the ink sets on top of the print instead of quickly absorbing into the photograph paper.  This is a mixed blessing.

I would have been much better off using a regular ink pen.  Yes, I know:  standard ink is bad for photos.  Bad.  And so, my first attempt of decorating photos with ink was a partial failure.  Live and learn, right?

________________________________________

The Peach Keen Stamp set arrived in the mail today.  My first project using these stamp will surely involve anthropomorphizing a soccer ball, since the next scrapbook page involves documenting this winter's Futsol games.  It's safe to say there will be many uses for the stamps throughout the hobby.  Now I'm dancing around waiting for next month to buy the animal faces.  I did decide that eventually the monster faces are a must.


________________________________________

Getting down the right photography skills is a process and world into it's own.

Another projects finished in the past week:


Feeling A Little Snooty, Page 2